My Gardening Journey – Seed Starting Outdoors 101
As of now, we are nearing the end of May, but it’s not too late to start planting seeds outdoors! Seed Starting Outdoors 101 will take you through 6 simple steps to successfully grow your vegetable garden sowing seeds outdoors.
Have you prepped and set up your garden? Is it ready for sowing seeds? If not, please visit our article How to Start and Care for a Garden in 11 Simple Steps. From site selection to end year soil care, this article can help you begin your gardening journey.
Table of Contents
When to Start Seeds Outdoors
Now, this all depends on your growing season. If you have a shorter growing season, then more vegetable seedlings will need to be started indoors. If you live down south and have many warm months of the year, you will be able to start more of your seeds outdoors.
Search online for a planting calendar in your area. The Old Farmer’s Almanac has been very helpful for me, but there are many others to choose from as well. Enter your zip code to get more detailed information for your specific area.
Urban Farmer also has a useful vegetable planting schedule on their website. Search by hardiness zone or by state and you will get a planting guide for spring and fall crops.
Along with the online sources, check the seed packets for instructions and dates.
Tools and Items Needed for Seed Starting Outdoors
These are the items I use in my backyard garden. There aren’t too many tools needed for seed starting outdoors. Your hands are the best tools of all! There are definitely more tools available for larger gardens such as shovels, hoes, rakes, etc. This article focuses on the smaller garden tools.
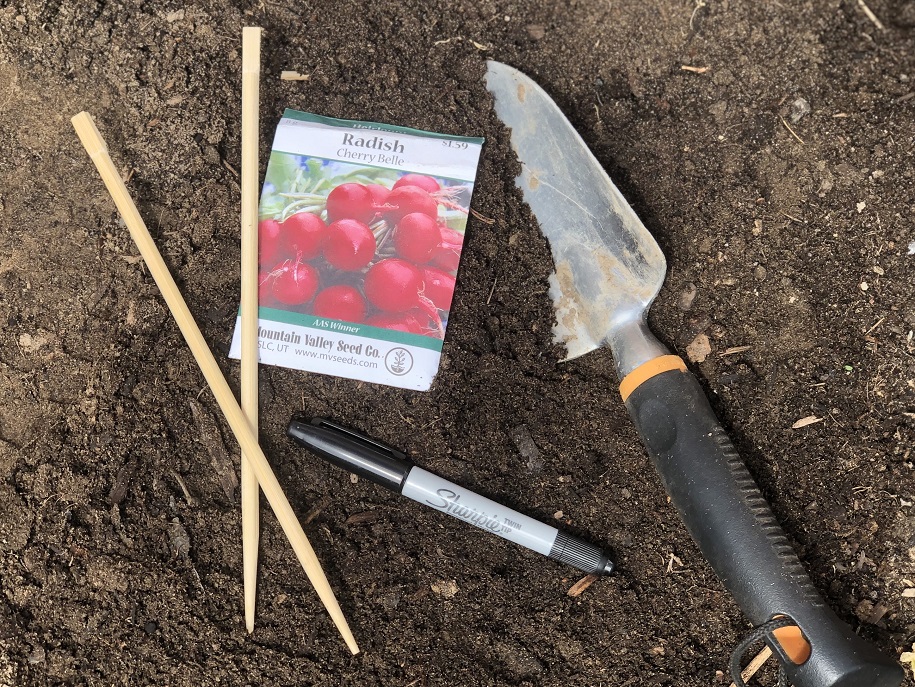
- Hand trowel for making the furrow and digging small holes.
- Seeds, don’t forget the seeds! These vegetable seeds and herb seeds packs would be great for starting out. They are organic, heirloom, and Non-GMO with zero-waste compostable packaging.
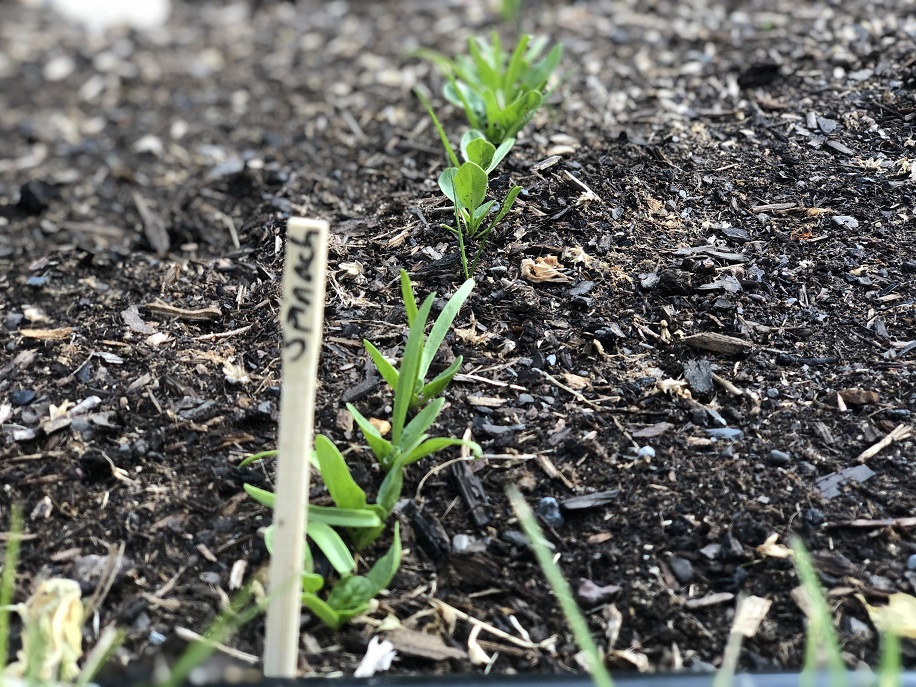
- Eco-Friendly Garden labels. These can be purchased at your local garden center or online. We like to try to reuse or use items we have around the house. This year, we used chopsticks!
- Your plan/garden map
- Sharpie and pen for the garden labels or for labeling your garden map
- Watering can with the rose attachment or garden hose with a watering wand or a nozzle attachment that has a shower setting.
- Gardening gloves (if desired)
- Your hands!
Direct Sowing Crops
Tomatoes, peppers, and eggplants love warmer temperatures and take a few months to mature. To get a head start, it is best to start these plants indoors. Their seedlings can be transplanted outdoors when evening soil temperatures reach 50 degrees. Refer to Seed Starting Indoors 101 for instructions on how to start seeds indoors.
- Cool Season Crops
There are many vegetable crops you can plant earlier in the spring in March and April and will thrive in the cooler temperatures. The average soil temperatures for these crops is 40 degrees. These vegetables do not thrive in hot summer temperatures.
These include radishes, carrots, beets, broccoli, kohlrabi, kale, lettuce, arugula, spinach, peas, onions, potatoes, and herbs.
- Warm Season Crops
There are many warm-season crops that actually prefer the warmer soil temperatures and will sprout quicker than if planted in cooler temperatures. They can be started outdoors in May and June and prefer soil temperatures above 50 degrees.
These include cucumbers, summer squash, winter squash, carrots, radishes, beets, beans, pumpkins, melons, cabbage, and herbs.
- Fall Garden Crops
Just when you thought the gardening season was over, it is time to start planting again for cooler weather fall crops. These seeds can be planted in July and August for a fall harvest.
These include radishes, carrots, broccoli, kohlrabi, arugula, kale, lettuce, spinach, peas, beans, and beets.
Seed Starting Outdoors
- Prepare the soil
When directly sowing seeds outdoors, the soil must be prepared for planting as well. The condition of the soil that is favorable for planting is soil that is not too dry and not too wet. If the garden was just watered, it is best to wait a day when the soil is crumbly but not wet. If it is dry, it will need to be watered.
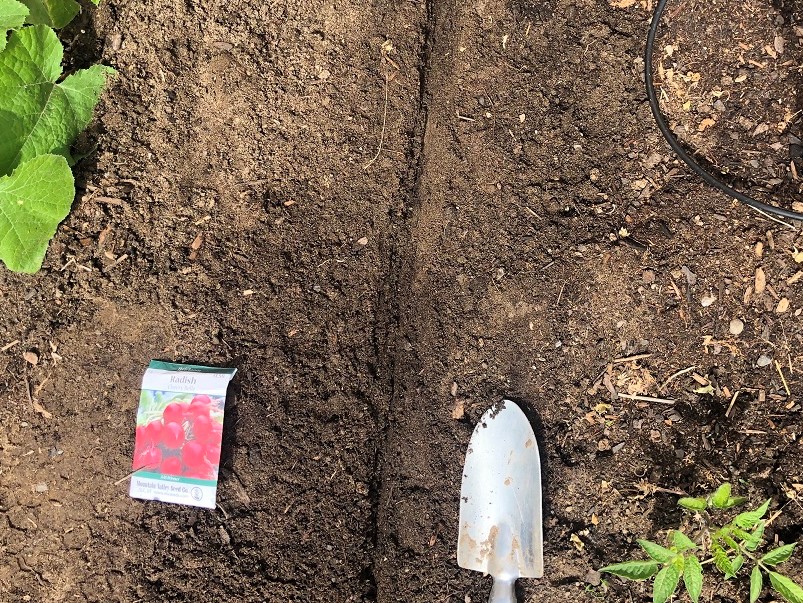
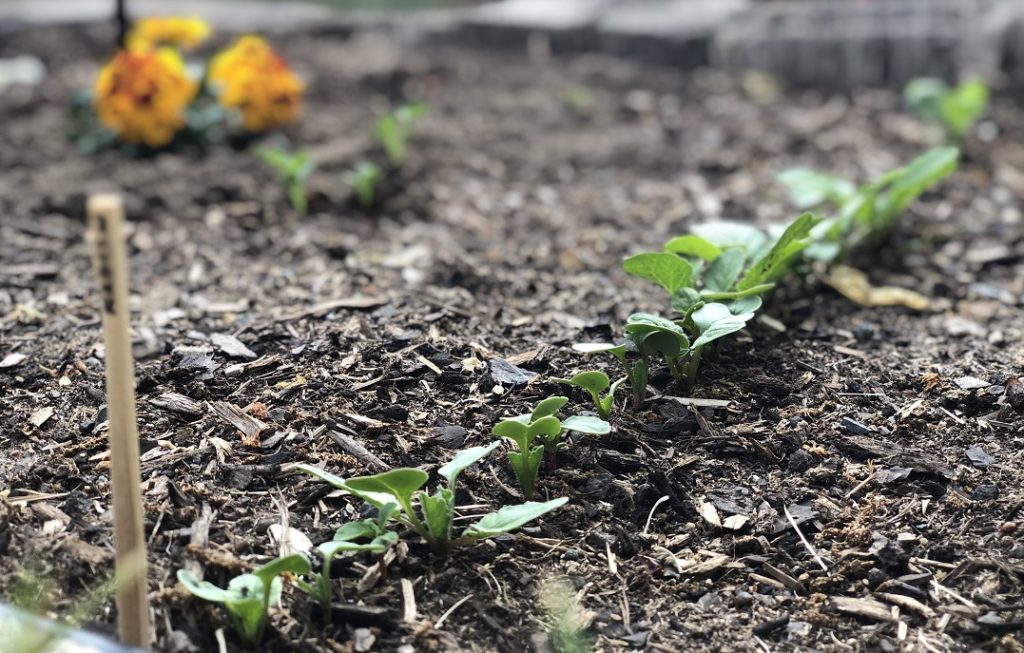
- Make a furrow
What is a furrow? It is basically a trench cut in the soil for planting seeds. This method is used when planting in rows. You can use tools for this such as a small gardening shovel or a furrowing hoe. Or you can just use your finger as seed depths are usually not very deep.
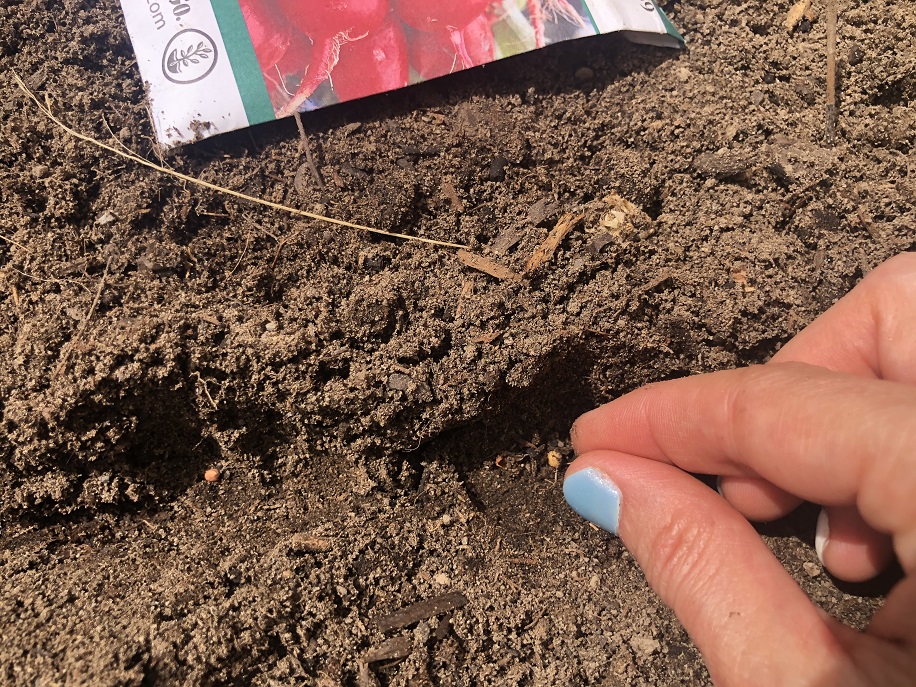
Consult the back of the seed packet for planting seed depth and spacing. Make the furrow the depth recommended on the seed packet. For example, radish seeds need to be planted ½ inch deep, so we will make the furrow ½ inch deep as well.
- Plant the seeds
Place the seeds along the furrow spacing them according to the seed package directions. Radish seeds will be placed 1 inch apart along the entire furrow.
The seed packet will also tell you how far apart to space the rows when planting a row next to the existing one. Radish rows need to be planted 12 inches apart.
- Cover the seeds with soil
Lightly cover the seeds with the soil you dug for the furrow. Give them a firm pat on top to settle the soil around the seeds.
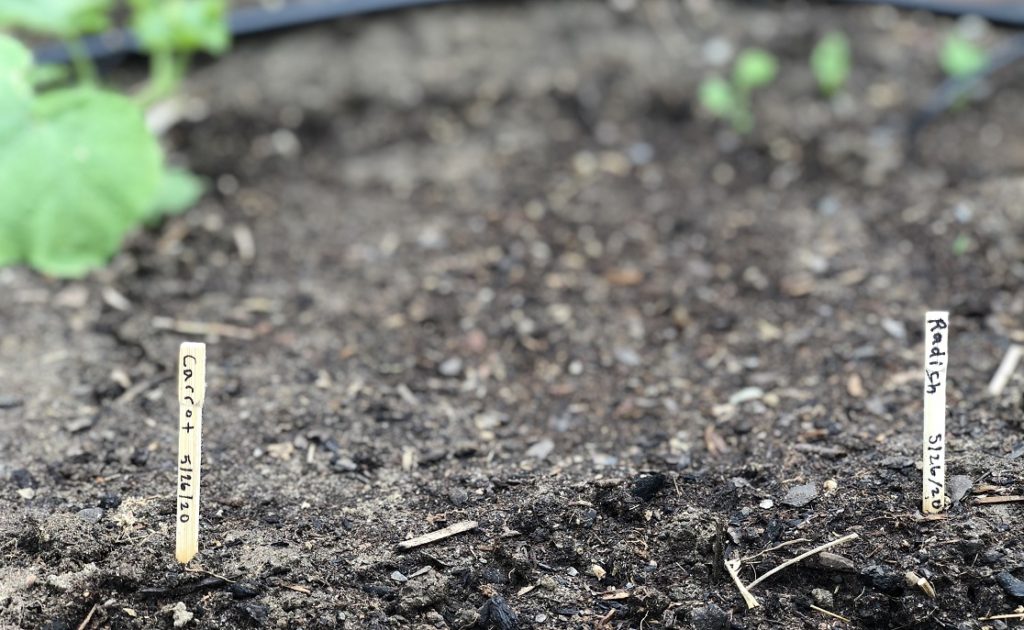
- Label the rows
Don’t forget to label! Use garden labels to place at the end of the row or near the plant itself, if labeling individually. Otherwise, make sure to create a map of your garden and label that as you go. It is important to label as you go. I wouldn’t recommend waiting until the day is done, even if you think you can remember everything. Believe me, I have been there!
It is also very helpful to write the date you planted the seeds on your label or garden map. This will allow you to observe the plants more carefully and will help you keep track of how the plant is doing in terms of germination and harvesting. Check the back of the seed packet for this information.
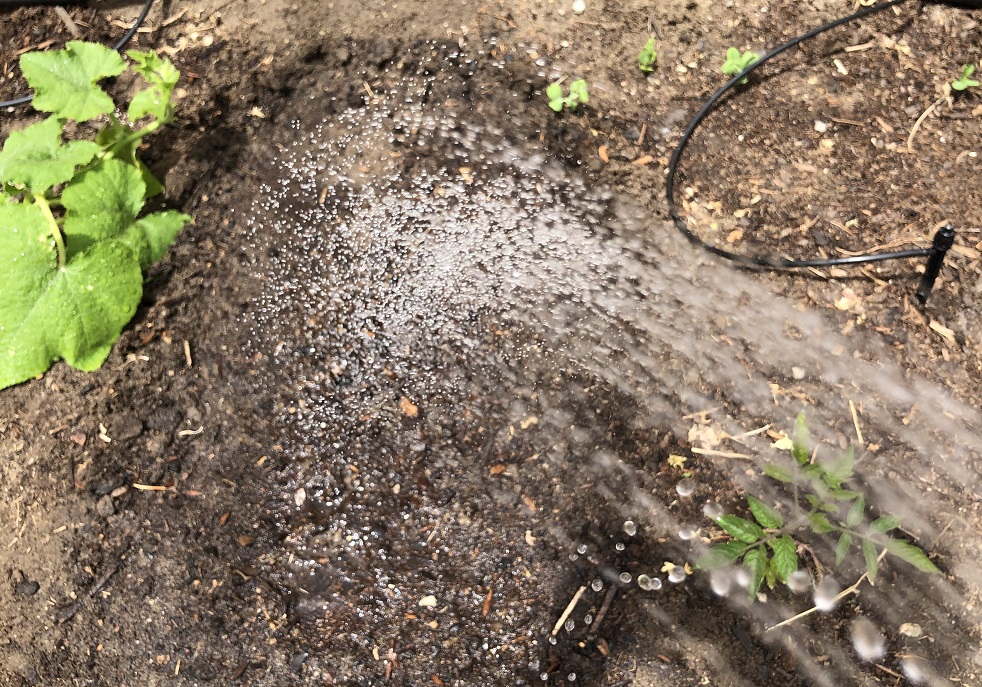
- Water the planted seeds
Once the seeds have been planted, they will need to be watered. This watering must be very gentle. Use a watering can with the rose attachment or use the garden hose with a nozzle attachment that is set to the rain or shower setting.
Now that the seeds are planted and watered, keep an eye on the soil. The seeds need to be kept moist in order to sprout. But do not under or over water them.
You can test the soil with your finger. Insert your finger in the soil, close by where you planted the seeds, if your finger is clean, you need to water. If your finger comes out with soil sticking to it, there is enough water. There are also devices you can purchase that will let you know when to water as well.
Not sowing seeds in rows?
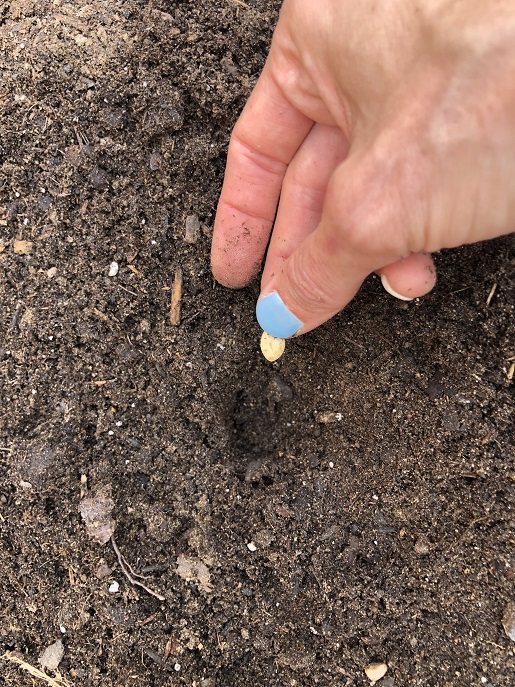
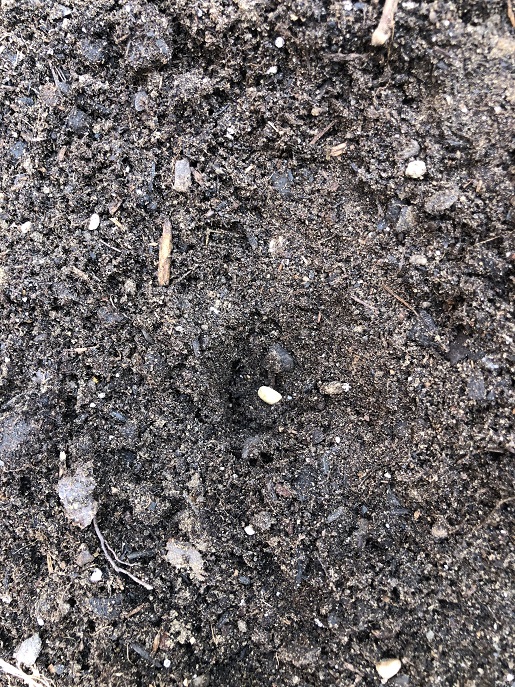
If you are not sowing the seeds in rows, simply make a hole with your finger. Use the back of the seed packet for the seed depth.
Place the seed in the hole, cover with soil, and give the soil a firm pat on top to settle the soil around the seeds.
Pay close attention to seed spacing and make sure the vegetables have enough room to grow. You may want to place 2-3 seeds per hole to ensure germination.
Water the seeds as stated above and you are all set.

Thin Seedlings
Once the vegetable seeds start sprouting, it will soon be time to thin the seedlings.
The process of thinning seedlings is to keep the strongest plant and take out those that are smaller or weaker. If all seedlings are left in the garden row, they will end up competing against each other for space and stunt their growth, just as weeds do.
Thin seedlings when they are 2-3 inches tall and have developed 2 sets of true leaves. The first set of leaves you see when the plant begins to sprout are not the true leaves and should not be included in the 2 sets.
Snip the unwanted seedlings right at the soil line so as to not disturb the root system of the healthy growing plant that was kept. There is a thinning section on the back of the seed packet. It will tell you how far apart the plants you are keeping need to be from each other.
After the seedlings have been thinned, your plants will have room to grow strong and provide you with a bountiful harvest.
What to do with the thinned seedlings?
I have always had a hard time thinning seedlings because all the plants look so strong and I want them all to survive. If you have this feeling as well, remember many of these seedlings can be saved and eaten fresh in salads! They are full of nutrition and will give your salad favor as well.
What seedlings are edible? Most of the edible seedlings are those that you normally eat the plant leaves of, lettuce, kale, spinach, arugula, herbs, and pea shoots. You can also eat the seedlings of many root vegetables, radish, carrot, beet, and onion.
“The love of gardening is a seed once sown that never dies.”
Gertrude Jekyll
Gardening is a great way to connect with nature. Whether you have a smaller space and are container gardening or have a larger space and are planting directly in the ground. Gardening can bring a sense of calm and allow you to live in the present moment. It gives you time away from all the daily stresses of life. Focus on your task at hand. Nurture your garden and watch it grow.
Now that you have learned the process of seed starting outdoors, it’s time to get started!
Do you have any outdoor seed starting experiences or tips? Please share them below.

1 thought on “My Gardening Journey – Seed Starting Outdoors 101”