How to Grow Microgreens Indoors in Winter using Egg Cartons – Small Space Gardening
It is winter now, I am missing my garden, and I am craving fresh homegrown greens. Do you feel the same way? Well, I have got a quick and easy fix for you. Grow your own microgreens indoors!
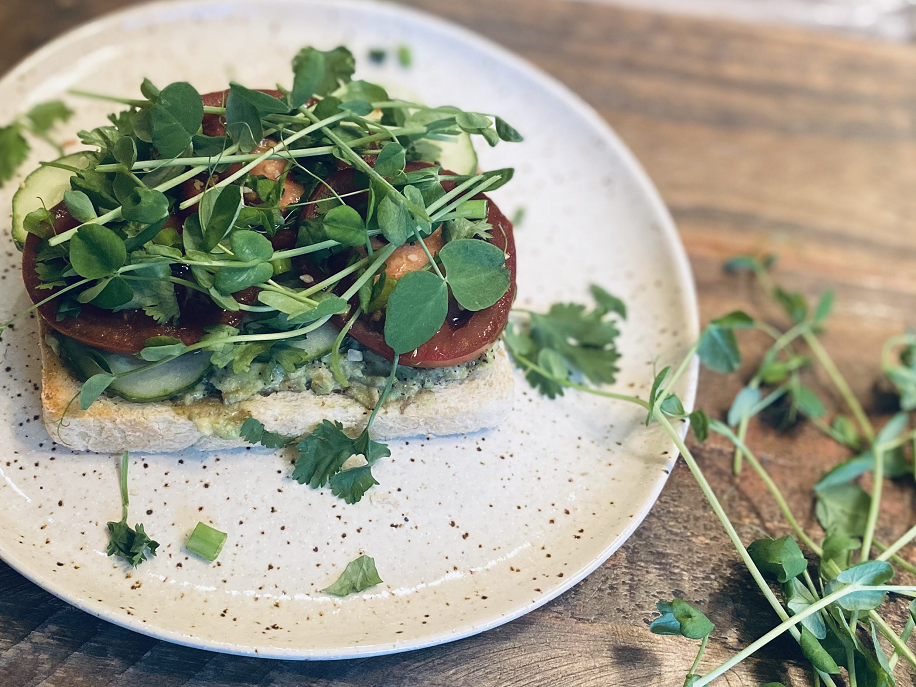
They are refreshing, delicious, and super simple to grow. Add them to any salad, sandwich, smoothie, juice them, use them as a garnish on your next omelet or bowl of soup, or eat them as-is for a snack!
I do not have indoor grow lights or a greenhouse, so everything I grow indoors is done on the windowsill using good old natural sunlight. Therefore, I do not have a whole lot of room to grow microgreens in large quantities. Growing microgreens using egg cartons or other small reusable containers is perfect for small spaces.
Since last spring, I have been saving up egg cartons to use when starting seedlings for my outdoor garden. I have accumulated so many that I decided to use these to grow most of our microgreens! They fit perfectly on our windowsill and I am able to reuse a product that can later be composted.
Below I have listed the steps I used to grow our microgreens in egg cartons, but first, we will take a little closer look at microgreens, what they are, and why we should grow and eat them.
Table of Contents
All About Microgreens
- Microgreens are the seedlings of edible vegetable plants and herbs.
- Microgreens usually take anywhere from 2-3 weeks to grow and are harvested when they are 1-3 inches above the soil line. Some plants, such as pea shoots, can grow up to 6 inches or more.
- Microgreens can be harvested when the cotyledon or seed leaves are present or grown to show their first set of true leaves. The longer the microgreens are left to grow, the stronger in flavor they become.
- Microgreens are grown in soil versus sprouts that are grown in water.
- Because microgreens are not grown to mature size, they can be grown very close together without worry about fighting for root space.
- Microgreens are very nutrient-dense. Studies have shown that microgreens actually contain a greater amount of micronutrients than the full-grown plant and fruits from that plant.
- Microgreens are a great way to add another element of flavor, crisp texture, and beauty that will liven up any dish. Microgreens vary in flavor depending on the plant grown. Some can be quite spicy while others are milder in flavor.
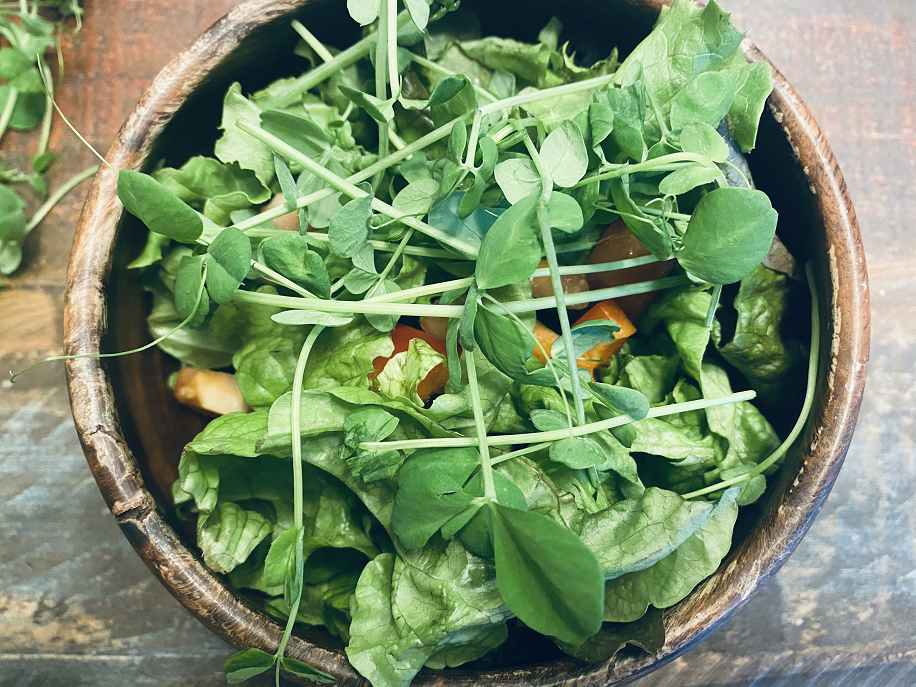
- Add your microgreens to your next salad, sandwich, or smoothie. Juice them or use them as a garnish on an omelet or bowl of soup. Or eat them as-is for a delicious healthy snack! Check out the Seedling Herb Salad recipe here that I made when using the edible seedlings from my outdoor garden this past summer.
- Microgreens can be grown year-round!
What types of microgreens can you grow?
There are many varieties of microgreens that you can grow. I have listed a few here to get you started. In the video above, I grew basil, red beets, golden beets, radish, and a microgreen mix that consists of broccoli, mizuna (Japanese mustard), red Russian kale, and purple Vienna kohlrabi.
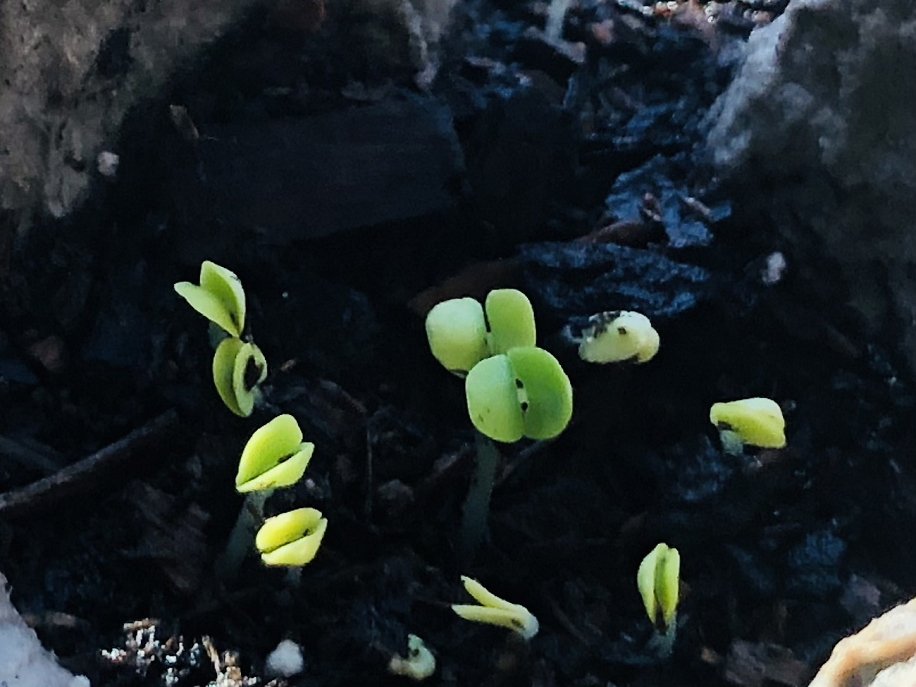
Basil (just sprouting) 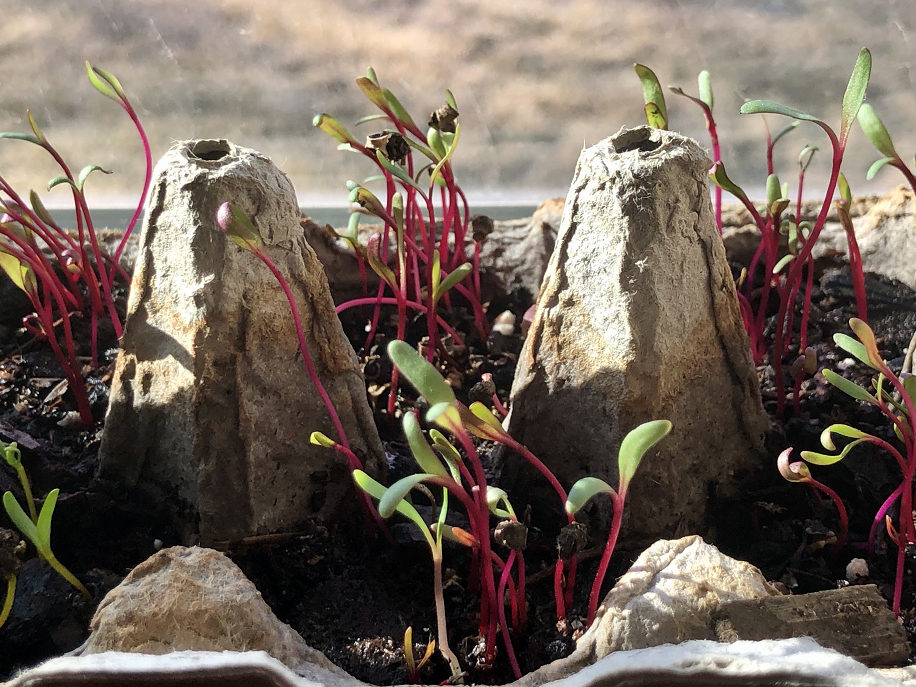
Beet 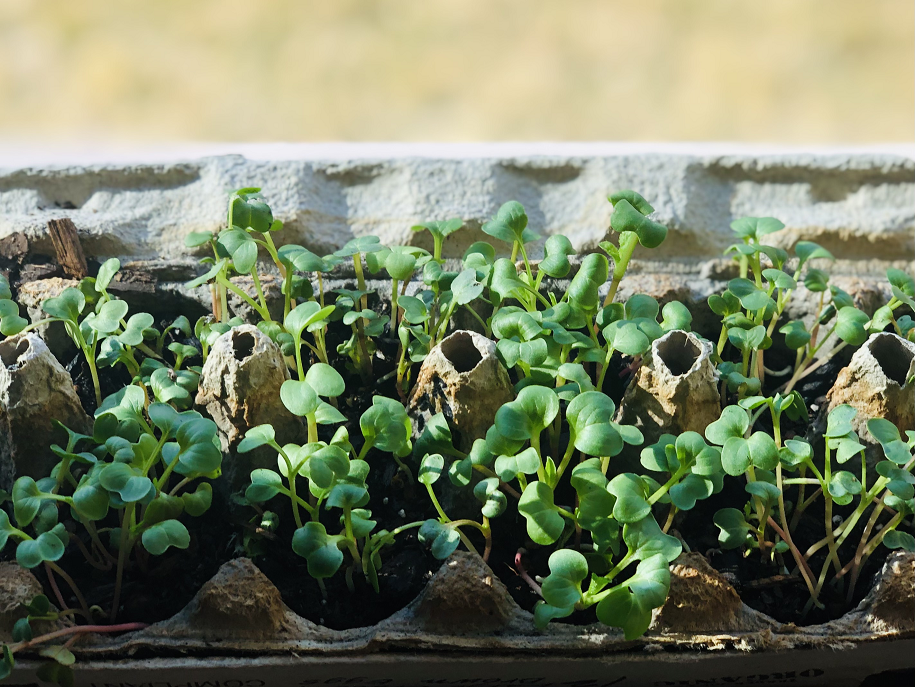
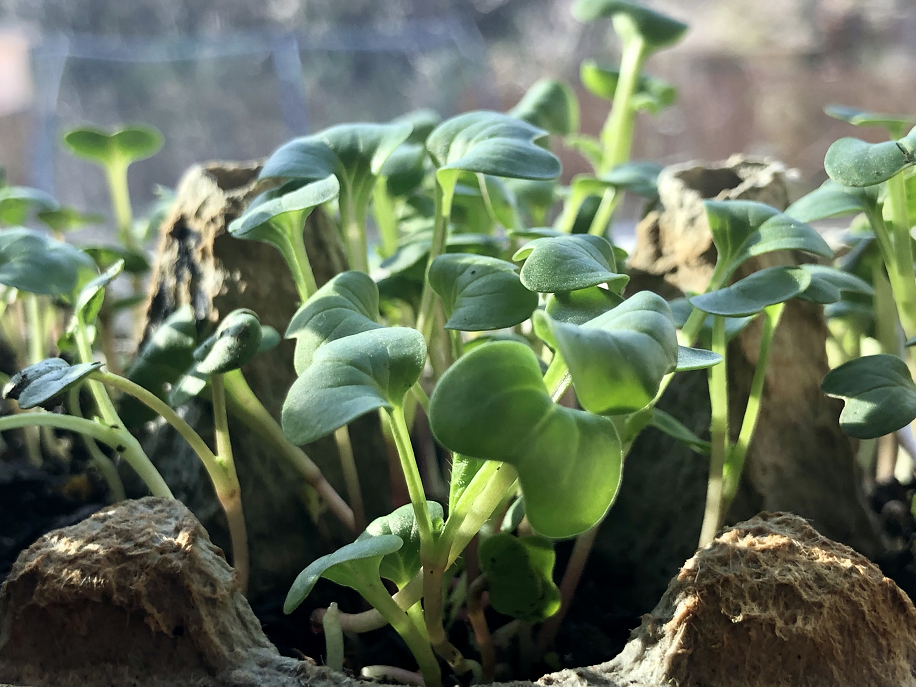
Radish 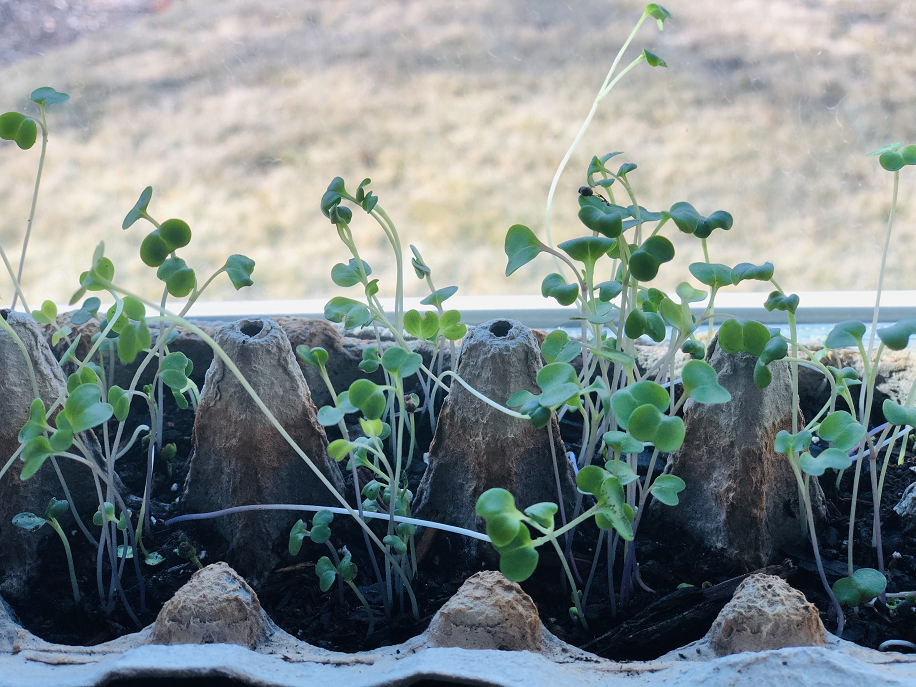
Microgreen Mix
alfalfa
amaranth
arugula
basil
beet
bok choi
buckwheat
broccoli
cabbage
carrot
cauliflower
chia
cilantro
collards
dandelion
dill
endive
fava beans
kale
kohlrabi
lemongrass
lettuce
mustard
radish
snap pea
spinach
sunflower
swiss chard
watercress
wheatgrass
*Do NOT eat microgreens from the nightshade family. These include tomato, pepper, eggplant, and potato plants.
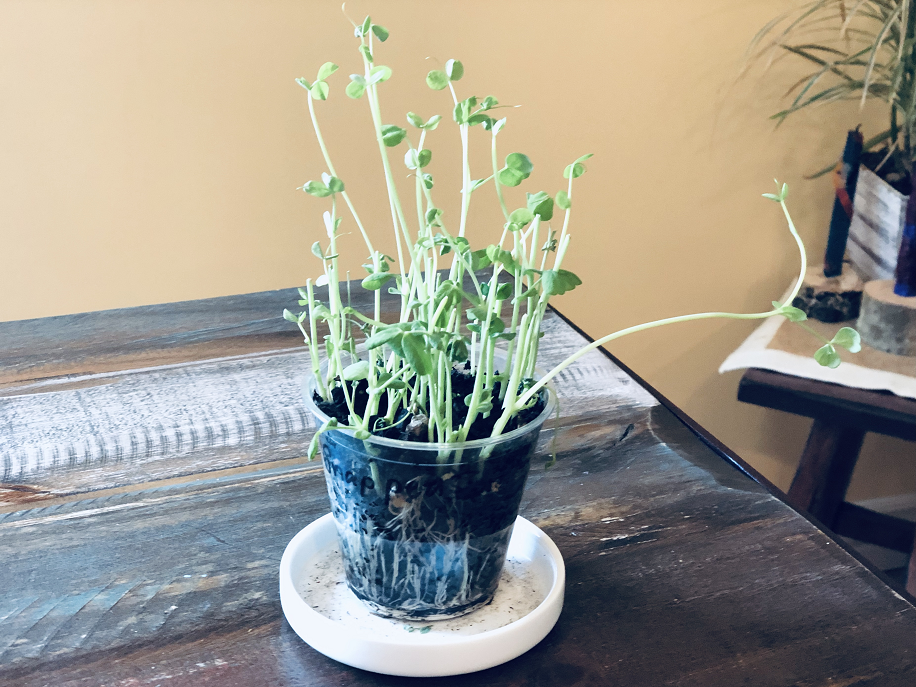
Will microgreens grow back once they have been harvested?
Many microgreen seedlings will not grow back once they have been cut. Some microgreens that will grow back include snap peas, fava beans, watercress, wheatgrass, and many herbs. I have recently grown and harvested a small batch of snap pea shoots. Here is a photo of the snap pea shoots 12 days after the first harvest.
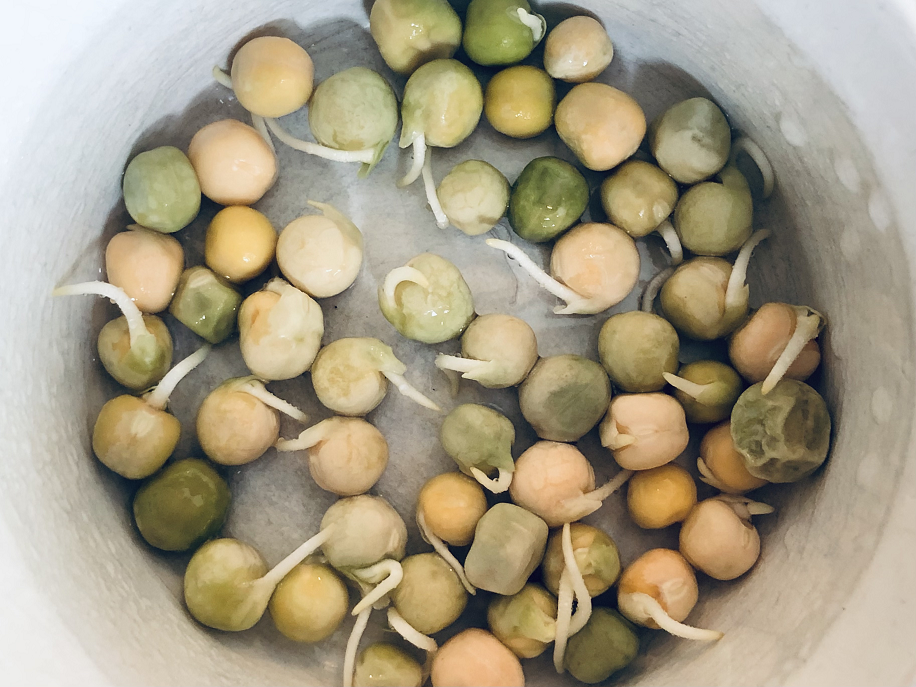
Do I need to soak the seeds before planting?
Seeds that are larger in size and have a thick coat should be soaked and sprouted before planting. This will help start the germination process of these larger seeds. Some of the seeds you will want to soak are snap pea, beet, swiss chard, buckwheat, sunflower, and others similar in size and/or thickness.
Place the seeds in a bowl, cover them with water, and allow to soak for 8 – 12 hours. I like to soak ours overnight.
After 12 hours, drain and rinse the seeds.
Keep the seeds in the bowl or in a deep tray and cover them with a towel. Be sure to keep the seeds moist and check on them often. If needed, add a spray or two of water.
Once you notice the seeds begin sprouting, the seeds are ready to be planted. Transfer them to your container filled with moist soil and add a light layer of soil on top.
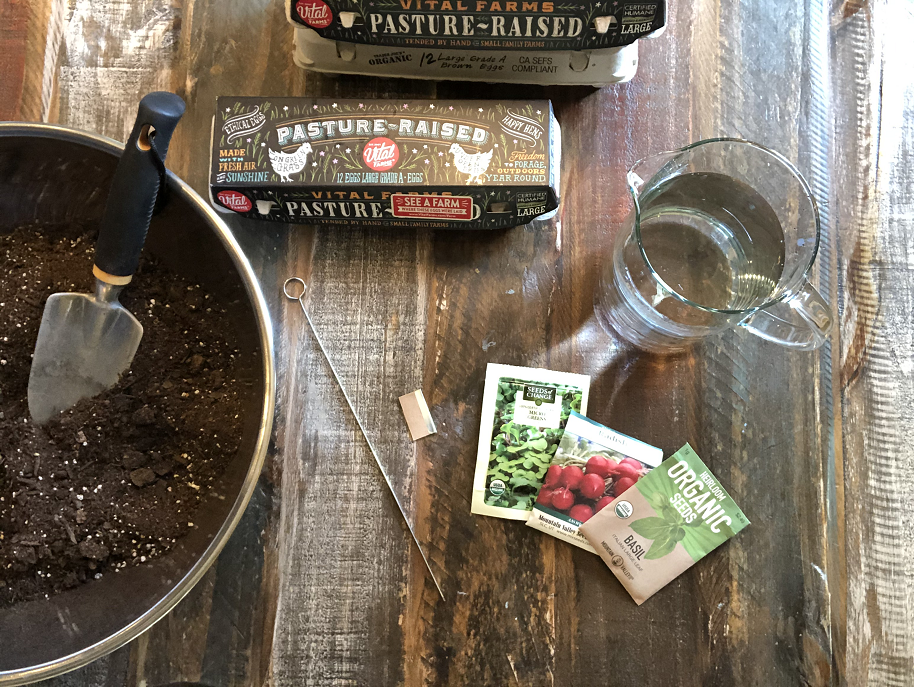
Supplies needed to grow microgreens indoors.
Egg Carton or Reusable Container
Razor Blade
Skewer, Sharp Knife
Bucket or Large Bowl
Potting Soil
Plant Seeds of Choice
Sharpie or Small Garden Labels
Dish towel or small tray to place under the egg cartons
Spray Bottle
How to grow microgreens indoors using egg cartons.
- Prepare the supplies
The first thing you need to do is to prep your egg carton or container of choice. I also like to reuse plastic cups, yogurt containers, trays, etc. If you are using an egg carton, open the carton and cut the lid off using a razor blade (see the video above). I like to use the lid as an extra tray underneath the plants, but you can also use it as a cover for the seeds before they start sprouting.
Use a skewer, knife, or something sharp to poke a hole or two at the bottom of each section of the carton. This will ensure proper drainage when watering the plants.
- Moisten the soil
Pour a small amount of potting soil into a bucket or a large bowl. Add just enough water to moisten the soil.
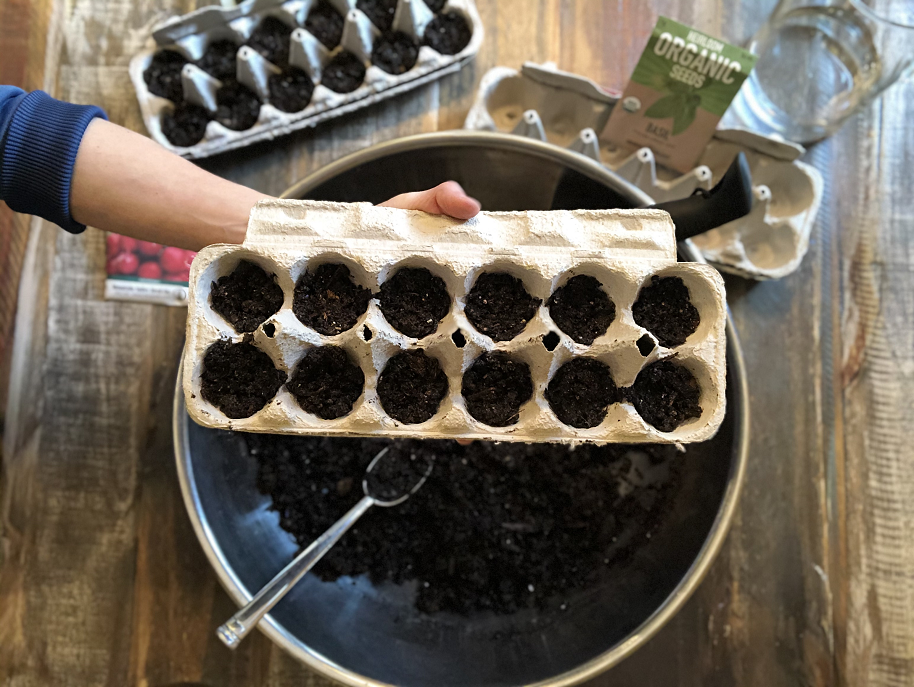
- Add soil
Fill each section of the egg carton or container of choice with the moistened potting soil. Fill it close to the top but not all the way as you will need one more light layer of soil on top of the seeds.
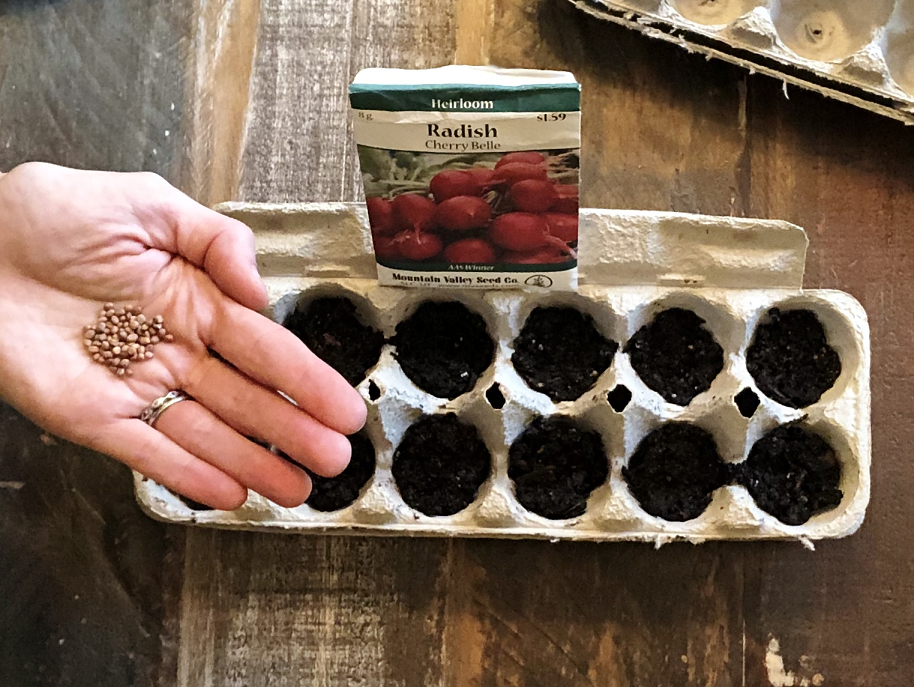
- Plant the seeds
Evenly scatter a good amount of seeds or soaked seeds (see above) to each section of the egg carton.
- Top with soil
Add a thin layer of soil on top of the seeds. Pat gently to settle the soil around the seeds.
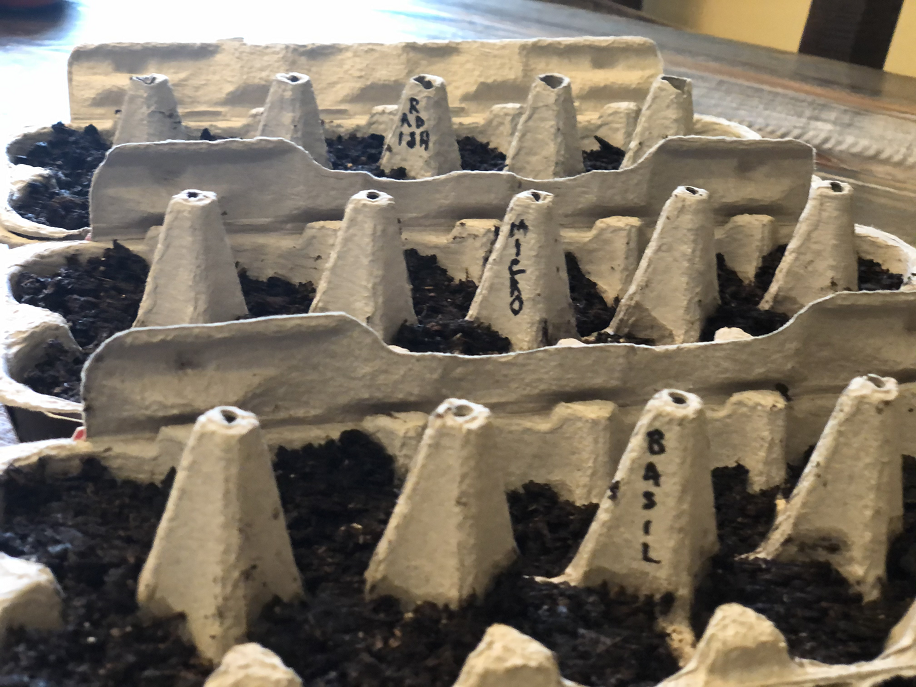
- Label
Label your plants. I wrote directly on the egg carton or plastic container with a sharpie. Small garden labels can work as well.
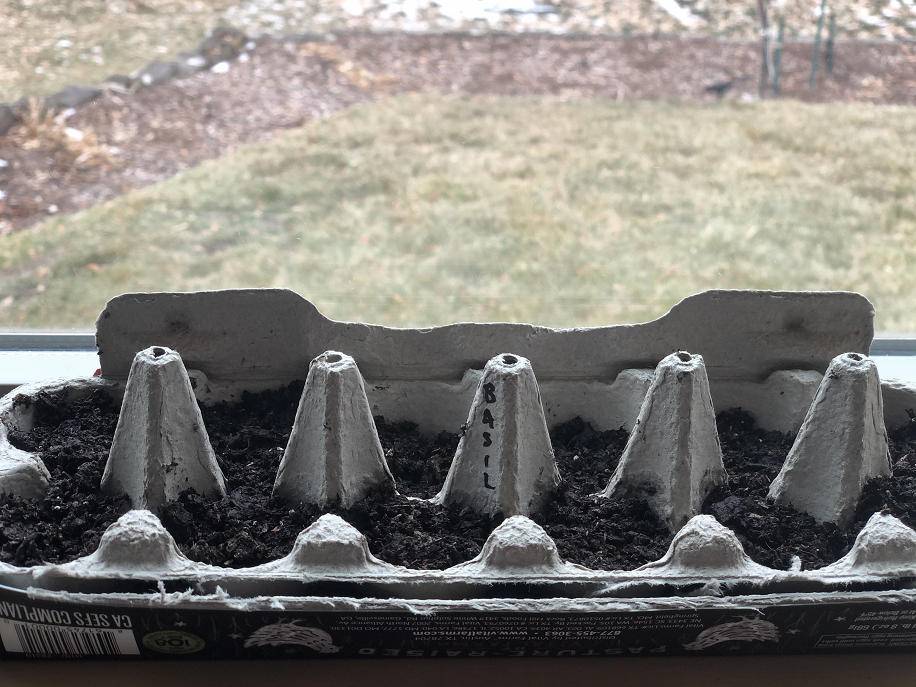
- Sunlight
Place the egg carton in a sunny window. It is not necessary, but you may cover the egg cartons with the egg carton lid, a towel, or plastic container to give the seeds some warmth during the first couple of days or so until they begin to sprout.
I like to put the seeds in the sunny windowsill during the day and move them away from the window onto a table and cover them in the evening to keep them away from the cold window during the night and to keep them warm.
- Water daily
Because the egg carton sections are so small, you may need to water 2-3 times per day depending on how warm it is in your home. Be sure to check on your plants quite often. Use a spray bottle and spray gently when watering.
As the microgreens grow, they will be quite fragile. You are not able to water from the bottom using egg cartons, so make sure you add enough water to moisten all of the soil and not just the top layer. Pay special attention to this as the plants begin to grow and roots get bigger in size.
Remember, you have holes in the bottom of your cartons. I like to use the lids as a second-layer tray under the plants and I place a towel on my windowsill and put the egg carton and extra tray on top of that.
- Harvest time!
Generally, microgreens are ready to harvest in 2-4 weeks or when the plants are 2-3 inches above the soil line. Some plants, such as pea shoots, can grow up to 6 inches or more. It’s really up to you! Give the microgreens a taste as they grow and you can decide what you prefer and how you like them.
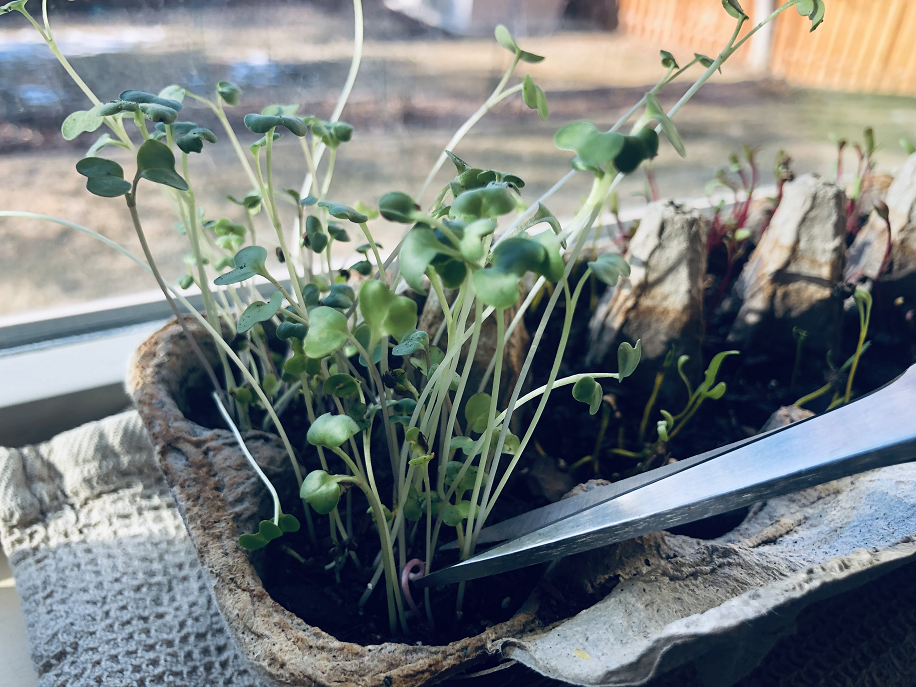
When you harvest your microgreens, snip the plant just above the soil line with some kitchen scissors. You can harvest a small amount at a time or harvest them all at once!
- Storage
Microgreens can last up to 1 week in the refrigerator if stored properly. They should not be too moist or too dry. Do not wash them right away if you plan to store them. Keep them dry and wrap a damp paper towel or a damp thin towel and place them in a resealable container or bag. Wash the microgreens in cold water when you are ready to use them.
- Enjoy!
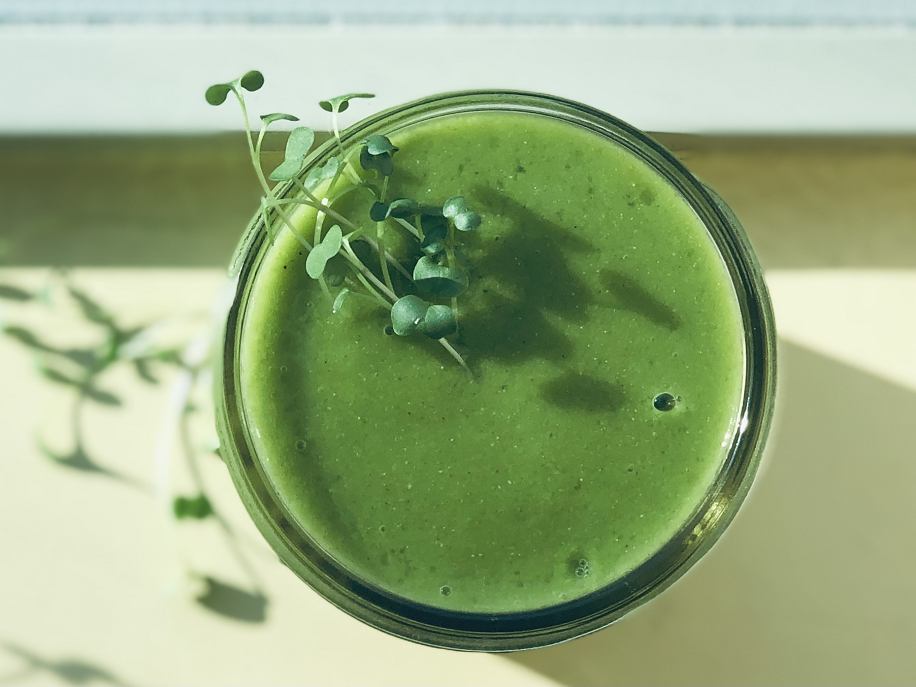
Add microgreens to your next salad, sandwich, or smoothie. (Try adding a small handful to our Nourishing Green Smoothie Recipe or your favorite green smoothie of choice). Juice them or use them as a garnish on an omelet or bowl of soup. Or eat them as-is for a delicious healthy snack!
Just because it’s winter, doesn’t mean we can’t grow healthy greens indoors! Microgreens are fun, easy to grow, and are a nutrient-packed addition to any meal. Growing microgreens is also a great winter activity to do with the whole family. The kids will have a blast planting, watering, caring for, and watching the seedlings grow.
Happy Planting! Happy Growing! Happy Eating!

Hurray, this is just the right information that I needed. You make me want to learn more! Stop by my page Webemail24 about Social Media Marketing.
Thank you. I’m glad it was helpful.
Thanks for the great article!
Thank you for your comment. I’m glad you enjoyed it.
Good post!
Thank you 🙂