How to Start and Care for a Garden in 11 Simple Steps
Have you ever wanted to start a garden but unsure where to begin? You have come to the right place. This article takes you through 11 simple steps to help you begin your gardening journey.
“All through the long winter, I dream of my garden. On the first day of spring, I dig my fingers deep into the soft earth. I can feel its energy, and my spirits soar.”
Helen Hayes
Why Start a Garden?
Gardening provides an outlet for self-growth and self-sufficiency. Now more than ever it is important to take a moment and appreciate the beauty and abundance that mother earth has to offer.
Not only does gardening provide us with vibrant healthy food, but it also allows us to connect with the earth in a way we may have not done before and can provide a new appreciation for the land and for our food. To learn more about the benefits of nature connection, read Connect with Nature for a Happier Healthier Family.
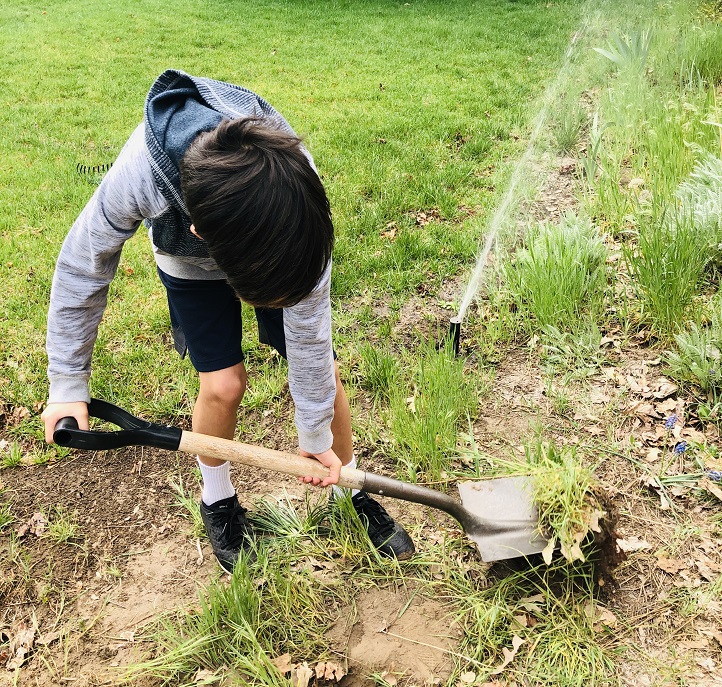
Gardening is fun for the whole family. Involve your children in every step of the process so they can see how their food is grown and where it truly comes from. It will be such an exciting time to watch the seeds sprout, the vegetables grow, and to harvest all on their own! How can this not encourage more veggie intake in your child’s diet? Or at least they will try new things?
Remember, any fruit or vegetable grown in the garden will always taste better than those bought from the store. Alright, anyone else excited to begin?
Let’s get started!
How to Start a Garden
- Site Selection
Picking the right location is very important for a successful garden. Most plants need 6 or more hours of full sunlight every day. There are some shade-tolerant plants such as lettuce, spinach, kale, etc. that can be planted in partially shaded areas, but be sure to check the back of the seed packet before planting.
Observe your yard, deck, balcony, wherever you are planting your garden for a full day, sunup to sundown. Take note as to which areas get the most sunlight, which have partial sun and which are fully shaded. Remember this will slightly change as the seasons change as well.
Choose a location that is flat and allows for good water drainage. Water should be evenly distributed in the garden. If the garden is planted on a slant or hill, water will run off in some areas and collect in other areas. Plants will not thrive with too little water nor will they do well in standing water.
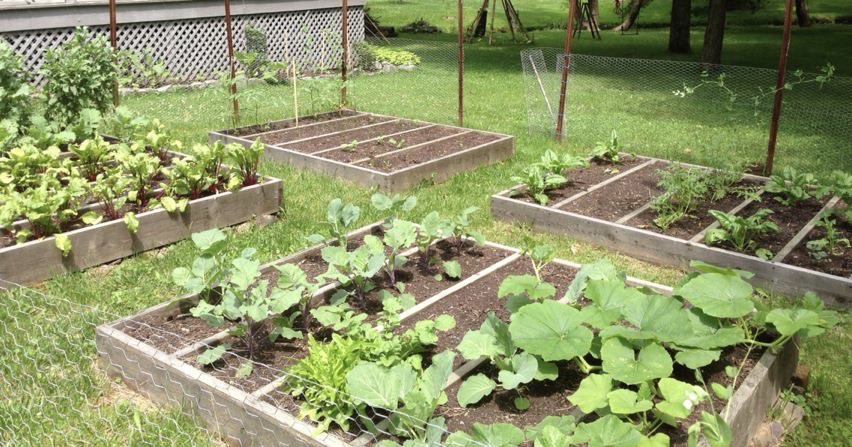
- Garden Type
Decide what type of garden you will be planting. Will you be following a more traditional in-ground garden, an above ground garden, or a container garden?
In-Ground Garden: Traditional in-ground gardens are less expensive to start out. Use the soil you already have and purchase only compost and/or amendments to add to the soil. In-ground gardens have easier access to irrigation which will require less effort to set up a watering system. In-ground gardens do not dry out as quickly thus needing less water. In many cases, in-ground gardens will be larger allowing for a more variety of vegetables to be grown.
It can be more challenging to create optimal healthy soil and may take many seasons to get it right in an in-ground garden. It is easier for animals and pests to enter your in-ground gardens. Garden fencing may be needed depending on your area.
Above Ground Garden: Above ground gardens are a great choice for those who need to grow more vegetables in smaller spaces. Above ground gardens can be built as high as needed. This will make it easier for harvesting and will be beneficial for those who have less mobility and are not able to garden in-ground. The soil warms up quicker allowing for earlier spring gardening. There are fewer weeds and crop diseases in above ground gardens.
Above ground gardens need more planning and upfront costs when starting out. The soil drains well but also dries out quicker thus needing more watering.
Container Garden: Growing vegetables in containers is a great option when you are limited on yard space or want to add more garden areas onto your deck. Container gardens require less weeding and there is less risk of acquiring plant diseases. Container gardens can be moved from place to place for sun requirements.
Container gardening may require a greater start-up cost for the containers themselves as well as the potting soil costs. More time will be required to water container gardens as they will tend to dry out quicker. Pots may restrict plant growth and plant choices will be limited to those that grow well in containers.
- Make a Plan
Start small and grow vegetables you enjoy eating. Plan what seeds you will be planting and where they will fit in your gardening space. I like to draw out plans on paper of my garden so I know what seeds will need to be planted and where they will go.
Purchase the vegetable seeds. We prefer to buy organic and heirloom varieties. Some vegetables are best started indoors and some outdoors. The back of the seed packet will provide this information for you. Vegetables that have a harvest longer than 90 days should be started indoors. This also depends on the climate you live in. If you live in a warmer climate, you may be able to start all of your seeds outdoors.
Search online for a planting calendar in your area. The Old Farmer’s Almanac has been very helpful for me, but there are many others to choose from as well. Enter your zip code to get more detailed information for your specific area.
Urban Farmer also has a useful vegetable planting schedule on their website. Search by hardiness zone or by state and you will get a planting guide for spring and fall crops.
Along with the online source, check the seed packets for instructions and dates.
- Prepare the Garden Area
Traditional method: Clear the area by removing any existing plants/shrubs, sod, rocks, and weeds. Dig 8 to 12 inches in depth to loosen the soil. Add 2-4 inches of compost or other organic matter and amendments as desired and mix it in with the existing soil.
Above ground garden: Use a mix of topsoil, compost, other organic matter and amendments, such as worm castings, manure, mushroom compost, kelp meal, etc.
Container Garden: The best option is to purchase a potting soil mix. These are specifically formulated to give the plants optimal nutrients, reduce the chance for pests and diseases, allow for proper soil drainage giving the roots access to air but still retaining moisture. Garden soil is too dense and may retain too much moisture with limited airflow creating root rot.
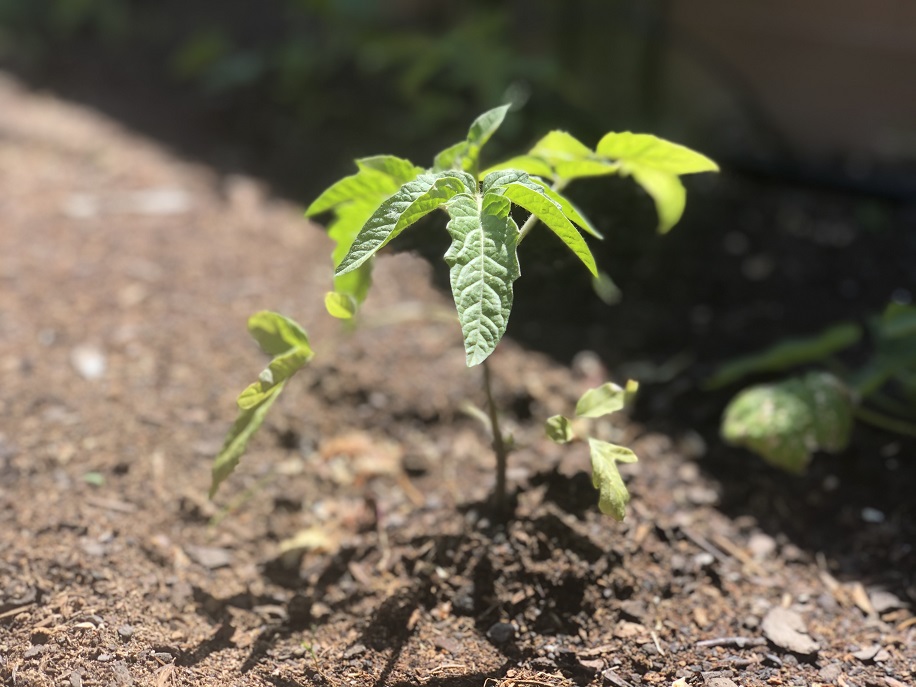
- Plant the Seeds and/or Seedlings
Now that you have made your garden plan and prepped your garden area, it is time to plant! Consult the back of the seed packet for information on when to start planting, how deep to plant the seeds, how far apart to plant the seeds and rows. If you started your seeds indoors or purchased seedlings, be sure to leave plenty of space between plants and rows.
Remember to take into account the height of each individual plant. Organize your garden area so that the taller plants do not take away sunlight from the shorter plants.
Learn how to start seeds indoors here, Seed Starting Indoors 101
Learn how to start seeds outdoors here, Seed Starting Outdoors 101.
- Water the Garden
How and when to water the vegetable garden is very important. In general, the plants require about 1 inch of water on the surface area per week. Give or take a little depending on your soil, weather, and type of plants you are growing.
Drip irrigation systems are best for vegetable gardens, but sprinkling systems can work as well. The trick is figuring out how much you need to water to achieve the 1-inch mark per week. Source If you live in hot dry climates, more water will be required. Bonnie Plants suggests adding another 1/2 inch of water for every 10 degrees above 60 degrees.
Be sure to test your soil to make sure your plants are getting enough hydration. You can test the soil with your finger. Insert your finger just past 2 inches in the soil and your finger is clean, you need to water. If your finger comes out with soil sticking to it, there is enough water. There are also devices you can purchase that will let you know when to water as well.
- Weed the Garden
Weeds can overtake the garden if you are not careful. Weeds can compete with vegetable plants for space and hinder growth. Weed the garden regularly to ensure the vegetable plants have optimal space for root growth and plant health.
Traditional method: One way to reduce weed growth is to add a 2-3 inch layer of mulch to the top of your garden soil. There are many different types of mulch that can be used such as dried leaves, grass clippings, hay, and wood chips.
Raw wood chips as long as they are only placed on the top of the soil. When they start to break down, they will take some nitrogen from the soil but only from the top and shouldn’t be enough to make a difference to the vegetables. Make sure the raw wood chips are NOT mixed in with the soil. (Source) Otherwise, it will be necessary to use a compost mulch that has allowed the wood chips to break down for a year or two before mixing it with soil.
Above ground garden: Garden beds are usually planted for optimal output and have many plants close together which can overcrowd the planter not allowing weeds to grow. Placing newspaper or cardboard under or at the bottom of the garden bed before adding the soil can help reduce weed growth as well.
Container garden: Use proper potting soil to reduce weed growth in pots. Observe the pots on a regular basis and remove any weeds that may be growing. The plants will need as much space as possible for optimal growth in containers.
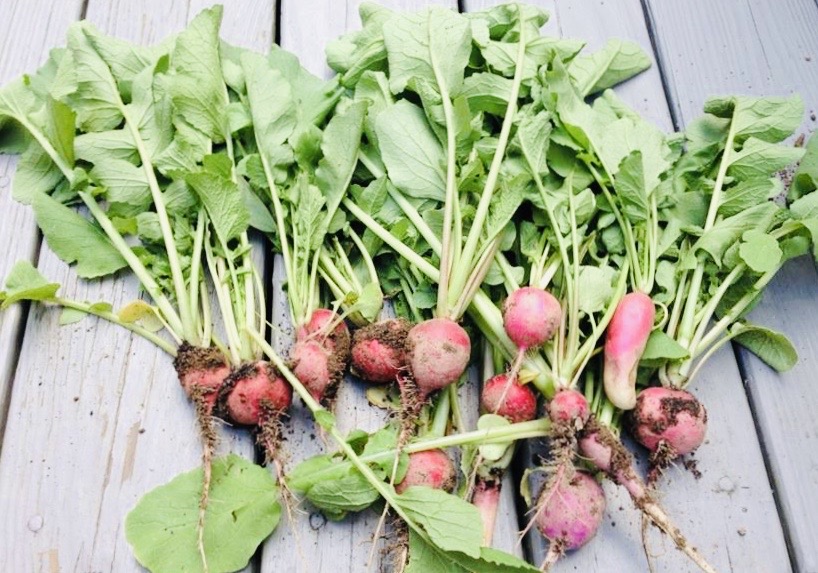
- Learn How and When to Harvest
Once again, the trusty seed packet will advise you when it is best to harvest that particular vegetable and what to look for regarding vegetable size, shape, and color.
Refer to your planting calendar and when the timing is right, check on the plants daily as vegetables will ripen at different times and will need to be picked before they become overripe.
Remember to be gentle when harvesting vegetables to reduce damage to the vine or stem of the plant or other growing vegetables on that plant that aren’t quite ready for harvest.
Do some research and learn about the edible parts of each plant. Take beets and radishes, for example, many people eat the roots and discard the greens. Did you know the greens are edible as well? They can be cooked or eaten raw in salads.
- Make a Plan for Food Storage and Preservation
Of course, much of your garden harvest can be enjoyed fresh, but if you do have a larger garden or are not able to go through all of your fresh vegetables, make a plan for how you will store and/or preserve these items. Different methods of storing or preserving foods are dehydrating, canning, making jams and jellies, drying, and freezing.
- Plan your Fall Harvest
Are you ready for round two? Come mid-July or August (depending on where you live), certain crops can be planted again for a fall harvest. Some fall crops include lettuce, spinach, broccoli, beets, carrots, cabbage, kale, and peas.
You will most likely be very busy checking on and harvesting your summer crops, but if you make your plan ahead of time and allow some time to focus on your fall crops, you will be set to harvest more tasty vegetables before winter.
- End of Year Soil Care
It is not necessary to remove all the old vegetable plants and roots from the garden before winter. Leave the roots in the soil to feed the soil microbes over winter. Cut the tops of the plants off and lay them on top of the soil to act as a mulch. (Source) Add a layer of mixed compost and fallen shredded leaves which will decompose during winter for a more fertile spring soil.
In Conclusion
Plan to grow a small garden when you are first starting out. Grow vegetables you love to eat. Get to know those vegetables well. What are their plants like? When are they ready to be harvested? Some great vegetables to start with are radishes, sugar snap peas, green beans, lettuce, tomatoes, beets, cucumbers, and zucchini.
There is no better time than now to start your garden. Starting a garden can be overwhelming at first, but once you take that first step, its small consistent steps from there. Follow the 11 simple steps listed in this How to Start and Care for a Garden article and you will be well on your way.
Good luck and happy planting!
We would love to hear about your gardening journey, please share below.

4 thoughts on “How to Start and Care for a Garden in 11 Simple Steps”